Custom Whitening Trays: Your Complete Guide for 2026
- Mayde Mersal
- Aug 11
- 10 min read

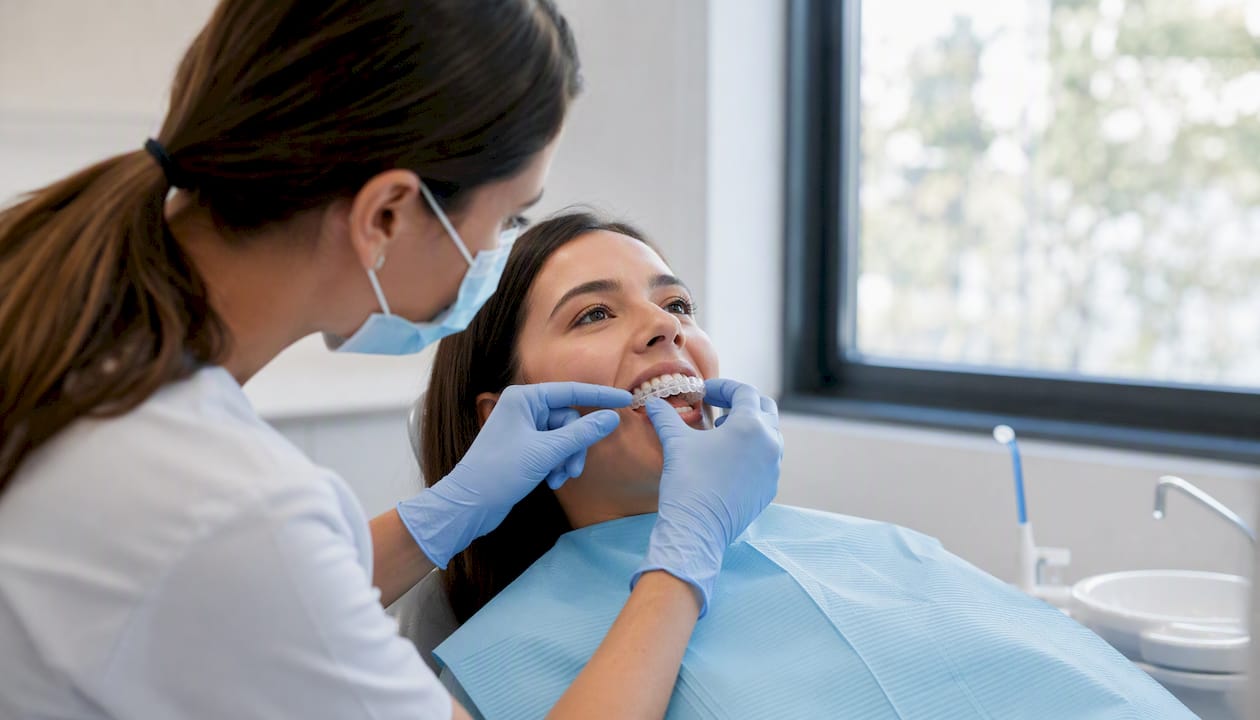
Custom whitening trays are worth it for most adults who want results that go beyond what drugstore strips can deliver. The fit is precise, the gel coverage is uniform, and you control the schedule. Three realistic routes exist: dentist-made trays (fabricated in-office or dispensed as a take-home kit after an appointment), mail-order lab kits (you take impressions at home and ship them to a dental lab), and OTC prefilled trays (no impressions, single-use, limited customization). Your next step depends on your situation:
Dentist-made trays: Book a dental appointment, get an impression or scan, and pick up your trays within one to two weeks.
Mail-order lab kits: Order a kit from a vetted provider like SportingSmiles, ClearRetain, or Dental Lab Direct, take impressions at home, and receive lab-fabricated trays by mail.
OTC prefilled trays: Buy off the shelf with realistic expectations — they work on surface stains but rarely deliver the even coverage of a custom-fitted tray.
Key Takeaways
Custom whitening trays outperform OTC strips and prefilled options because precise fit keeps gel in contact with every tooth surface, including molars and irregular alignments, which is what drives uniform shade change.
Point | Details |
Three routes exist | Dentist-made, mail-order lab kit, and OTC prefilled trays differ most on fit, cost, and oversight. |
Reservoirs drive results | Tray reservoirs hold gel against enamel and reduce gum overflow, improving both safety and whitening evenness. |
Sensitivity is manageable | PF gel formulations with potassium nitrate and fluoride, plus gradual ramp-up, keep sensitivity at a comfortable level. |
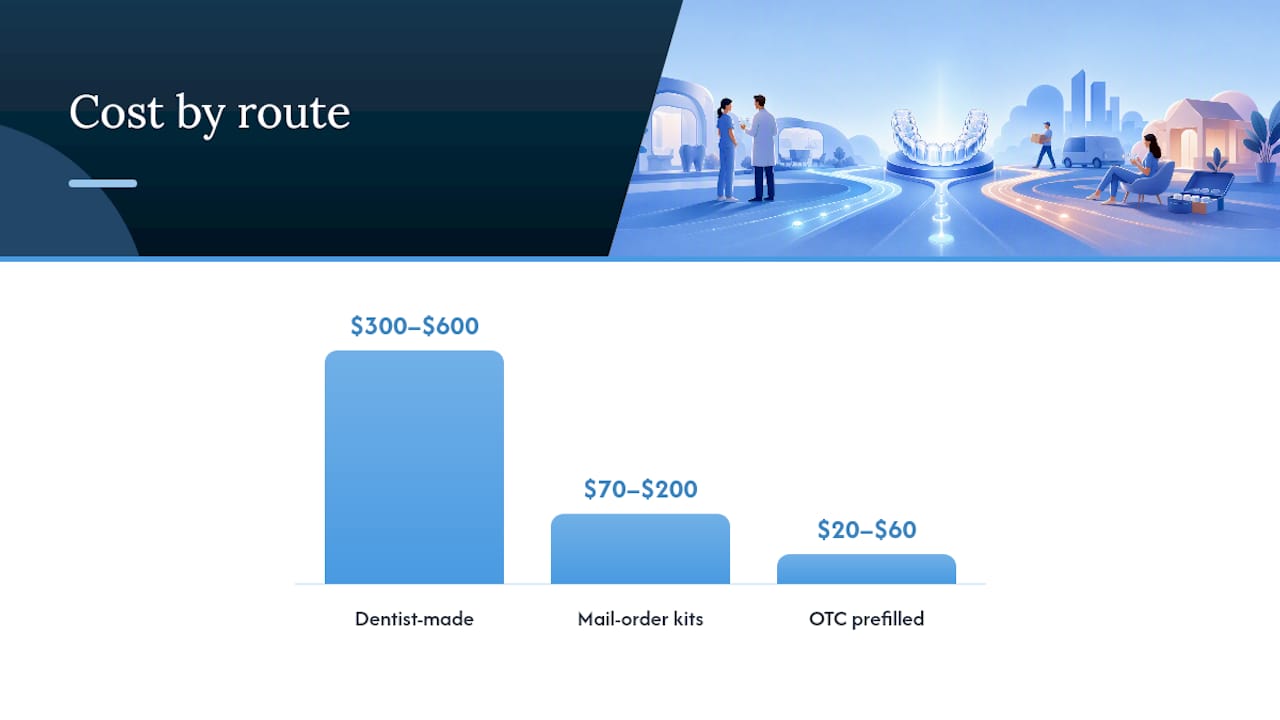
Cost range is wide | Mail-order kits run $70–$200; dentist-made trays run $300–$600; OTC prefilled options cost $20–$60. |
Mersaldental offers both | Ottawa-area patients can book in-office or take-home whitening with a clinical fit check and direct insurance billing. |
Table of Contents
How do custom whitening trays compare to mail-order kits and OTC options?
The three routes differ most on fit accuracy, gel strength, cost, and how much professional oversight you get.
Provider type | Fit accuracy | Gel included | Cost (USD) | Turnaround | Ordering method | Warranty/support | Sensitivity risk |
Dentist-made | Highest (clinical impression or scan) | Yes, prescription-strength | moderate to high cost | 1–2 weeks | In-office appointment | Dentist adjusts fit | Managed with guidance |
Mail-order lab kit | High (patient impression) | Often yes, OTC-strength | moderate cost | 1–2 weeks shipped | Impression kit at home | Varies by provider | Self-managed |
OTC prefilled trays | Low (universal fit) | Yes, prefilled | low cost | Immediate | Retail purchase | None | Mild to moderate |
Dentist-made trays give you the most accurate fit and the strongest gel concentrations, with a clinician available if something feels off. The cost is higher, but the clinical oversight is real.
Mail-order lab kits from providers like SportingSmiles and ClearRetain use your at-home impressions to fabricate trays in a dental lab. The fit is meaningfully better than OTC, and costs are a fraction of in-office pricing. Look for providers that state lab location, offer a remakes policy, and include clear instructions.
OTC prefilled trays such as Opalescence Go use UltraFit-style universal trays with 10%–15% hydrogen peroxide and wear times of 15–60 minutes. They are convenient and require no impressions, but they are single-use and do not give you a reusable appliance for long-term touch-ups.
Trust signals to look for in any provider:
Lab fabrication confirmed (not just molded plastic)
Dentist oversight or review option
Clear remakes or refund policy
Detailed instructions and safety warnings included
How are custom whitening trays made?
The process moves from a precise impression to a lab-fabricated tray that fits your exact tooth anatomy. Here is what that workflow looks like:
Impression or intraoral scan: A dentist takes a physical impression using alginate or polyvinyl siloxane, or captures a digital scan. Mail-order kits include impression putty you bite into at home and mail back.
Lab model fabrication: The lab pours a stone cast or 3D-prints a model of your teeth from the impression.
Thermoforming: A thin sheet of thermoplastic material (typically 1.0 mm for daytime use or 1.5 mm for overnight wear) is vacuum-formed over the model.
Trimming and reservoir creation: The tray is trimmed along the gumline. Small reservoirs — shallow depressions on the inner surface — are cut or pressed into the tray to hold gel against each tooth and reduce overflow onto gum tissue.
Quality check and dispatch: The lab checks trim lines, occlusal relief, and overall fit before shipping or dispensing.
Why reservoirs matter: Trays with built-in reservoirs let the lab control gel volume per tooth and help reduce overflow onto gingival tissue. They also increase contact time between the gel and enamel surface, which is where the bleaching reaction actually happens.
Material notes:
Tray thickness affects comfort and durability: thinner trays (0.9–1.0 mm) feel less bulky; thicker trays (1.5 mm) hold their shape better over time.
A clinical-fit check — either at pickup with your dentist or via a photo sent to the lab — is a low-cost quality step that catches overextended edges before they irritate your gums.
Why do custom trays usually outperform strips and OTC options?
The core advantage is consistent gel-to-tooth contact across every surface, including molars and irregular alignments. Strips fold flat; they miss the curves between teeth and rarely reach back molars. Generic OTC trays sit loosely, letting gel migrate onto gum tissue and away from tooth surfaces.
Reasons custom trays deliver more uniform whitening:
Precise fit holds gel against all tooth angles, including rotated or crowded teeth
Reservoirs prevent gel from pooling or thinning unevenly
Coverage extends to molars, which strips almost never reach
You control wear time and concentration, so you can pace treatment to your sensitivity level
Custom-fitted trays provide more uniform gel coverage across tooth surfaces compared to generic over-the-counter options, a difference that is most noticeable in patients with crowding or irregular spacing.
That speed is genuinely useful before a wedding or event. For ongoing maintenance and gradual whitening at your own pace, take-home custom trays are typically more practical and cost-effective. Many patients do both: an in-office session for the initial lift, then take-home trays to maintain and deepen the result.
Shade change and sensitivity are directly linked to gel concentration and how well the tray fits. A loose tray wastes gel on gum tissue and increases irritation without improving results. A well-fitted tray with the right concentration does the opposite.
How do you order custom trays, and what should you expect?
Dentist-made workflow:
Book a dental appointment (cleaning recommended first if overdue).
Dentist takes an impression or digital scan at the appointment.
Lab fabricates trays (typically 5–10 business days).
Return to pick up trays; dentist checks fit and dispenses gel.
Begin whitening at home with clinical guidance on wear schedule.
Mail-order workflow:
Order an impression kit from a provider (SportingSmiles, ClearRetain, or Dental Lab Direct on Amazon).
Take upper and lower impressions using the included putty; follow the instructions carefully.
Ship impressions back to the lab (most providers include a prepaid envelope).
Lab fabricates trays and ships them to you (typically 5–7 business days after receiving impressions).
Begin whitening with included or separately purchased gel.
Typical costs and turnaround:
Dentist-made: moderate to high cost for trays plus gel; 1–2 weeks total
Mail-order lab kit: moderate cost including gel; 1–2 weeks total
OTC prefilled: low cost; available immediately
Checklist before ordering a mail-order kit:
Impression quality instructions are clear and include troubleshooting
Lab location is stated (domestic labs typically have faster turnaround)
Remakes policy is written and accessible
Kit includes upper and lower trays, gel syringes, a storage case, and instructions
Customer support contact is easy to find
Refund or satisfaction policy is clearly stated
How do you use whitening trays safely?
Correct application matters as much as the tray itself. Using too much gel, wearing trays too long, or skipping sensitivity management can cause gum irritation and tooth sensitivity that sets your whitening schedule back.
Dos and don’ts:
Apply a small pea-sized amount of gel per tooth compartment — overfilling causes gel to overflow onto gums
Seat the tray firmly and wipe away any excess gel that squeezes out immediately
Follow the wear schedule for your gel concentration: lower-concentration carbamide peroxide (10%–16%) is typically worn overnight; higher-concentration hydrogen peroxide (15%–35%) is worn for shorter sessions (30–60 minutes)
Do not eat or drink anything except water while wearing trays
Remove trays if you feel sharp or burning gum pain
Managing sensitivity:
Use a desensitizing toothpaste containing potassium nitrate for two weeks before starting
Ask your provider about PF formulations — professional take-home gels with potassium nitrate and fluoride reduce dehydration and sensitivity during treatment
Start with shorter wear times and ramp up gradually over the first week
Take a one-day break if sensitivity becomes uncomfortable; do not push through sharp pain
Storage and hygiene:
Rinse trays with cool water after each use; never use hot water (it warps the plastic)
Store trays in the ventilated case provided, away from direct sunlight
Replace gel syringes when they run out; most labs keep your model on file so you can reorder trays if they warp or crack
Pro Tip: After removing your trays, brush gently with a dry toothbrush before rinsing. This removes residual gel from the tray surface without introducing toothpaste abrasives that can scratch the plastic and shorten tray life.
What should a reliable whitening kit include?
A well-built kit covers everything from impression to first use without requiring you to source anything separately.
Must-have contents:
Impression putty or scan instructions (upper and lower arches)
Clear, step-by-step lab instructions with photos
Upper and lower custom-fabricated trays
Whitening gel syringes (at least 3–4 per arch for a full course)
Desensitizing gel or potassium nitrate gel (offered by better kits)
Ventilated storage case
Written instructions covering wear time, gel amount, and contraindications
Red flags to watch for:
No stated remakes or satisfaction policy
No lab contact information or dentist oversight option
Exaggerated shade-change claims paired with very low gel concentrations
Missing contraindication warnings (pregnancy, restorations, sensitivity)
No instructions for managing sensitivity
Kits sold through marketplaces like Amazon — including options from Dental Lab Direct — often bundle gel syringes and sensitivity-reducing products together. Check that detailed placement and removal instructions are included; their presence is a reliable signal that the manufacturer takes safety seriously. If a lab keeps your model on file, reordering replacement trays later is straightforward and usually costs less than the original kit.
What does whitening cost, and how long does it take?
Route | Typical cost | Lab/shipping time | Time to visible results |
Dentist-made trays | moderate to high cost | 5–10 business days | 1–2 weeks of nightly use |
Mail-order lab kit | moderate cost | 5–7 days after impressions received | 1–2 weeks of nightly use |
OTC prefilled trays | low cost | Immediate | Days to 1 week |
Timeline and running costs:
Most patients see a noticeable shade change within 7–14 days of consistent use with a 10%–16% carbamide peroxide gel
Higher-concentration hydrogen peroxide gels (15%–35%) can show results in 3–5 days with shorter daily wear sessions
Replacement gel syringes typically cost $15–$40 per set depending on concentration and brand
Replacement trays (if the lab keeps your model) usually run $30–$80 per arch
Dentist-made trays may include a warranty or adjustment visit; mail-order providers vary widely on this
When should you see a dentist before whitening?
Whitening is safe for most healthy adults, but certain conditions require a dental exam before you start. Applying bleaching gel to an unhealthy mouth can worsen existing problems quickly.
See a dentist first if you have any of the following:
Active tooth decay or visible cavities
Gum disease or bleeding gums
Exposed root surfaces (whitening gel on dentin causes sharp sensitivity)
Recent dental restorations — crowns, veneers, and composite bonding do not whiten, so whitening around them creates color mismatches
Severe or unprovoked tooth sensitivity
Pregnancy (whitening is generally deferred until after delivery)
What to mention at your appointment:
Tell your dentist which whitening method you are considering and the gel concentration.
Ask about any restorations that might affect your result.
Request a hygiene appointment before starting — clean enamel whitens more evenly and efficiently.
Ask whether your sensitivity level warrants a lower-concentration gel or a supervised protocol.
Dentist involvement changes both risk and outcome. A clinician can prescribe higher-strength gels, fabricate trays with clinical-grade fit checks, and offer in-office whitening as a faster first step before transitioning to take-home maintenance. If you have complex restorations or significant sensitivity, that level of oversight is worth the cost difference.
Our perspective: when we recommend dentist-made trays vs. mail-order
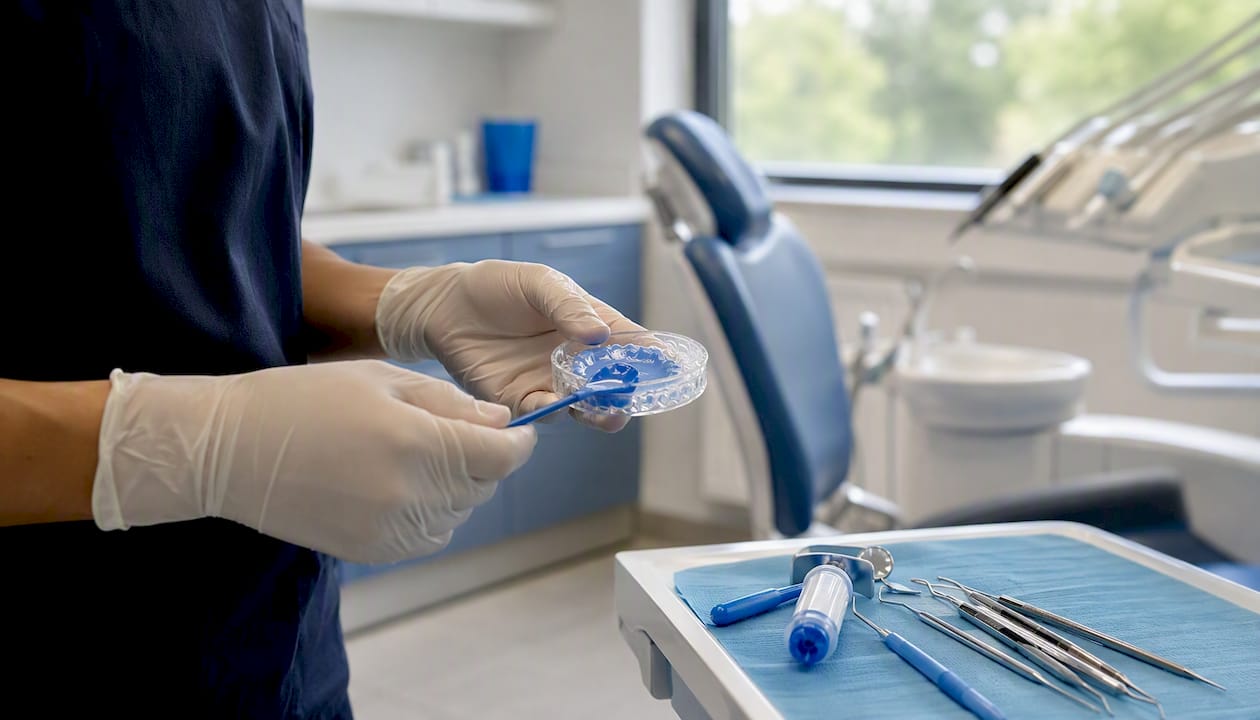
Mail-order lab kits have genuinely improved. For a healthy adult with no restorations, no significant sensitivity, and a straightforward arch, a vetted kit from a provider like SportingSmiles or ClearRetain will produce a good result at a fraction of the in-office cost. We have no objection to patients using them.
That said, we consistently recommend dentist-fabricated trays in three situations: patients with crowded or rotated teeth (where impression quality at home is harder to achieve), patients with existing crowns or veneers who need a color-matched whitening plan, and anyone with a history of sensitivity who needs a supervised gel protocol. For those patients, the fit accuracy and clinical oversight are not optional extras — they directly affect whether the treatment is comfortable and whether the result is even.
For patients in the Ottawa area who want the convenience of take-home whitening with the confidence of a clinical fit check, Mersaldental offers both in-office and take-home whitening kits. Book a consult, and we will tell you honestly which route makes sense for your teeth.
Mersaldental offers professional whitening with a clinical fit
If you have read this far and you are still weighing your options, here is the honest summary: mail-order kits work well for straightforward cases, but nothing replaces a tray made from a clinical-grade impression with a dentist available to check the fit and adjust your gel protocol.
At Mersaldental in downtown Ottawa, we offer both in-office whitening for fast results and take-home whitening kits fabricated to clinical standards. We accept new patients, bill insurance directly, and accept the CDCP program — so cost is rarely the barrier it might seem. Whether you want a single-visit brightening session or a custom take-home kit you can use on your own schedule, we will match the approach to your teeth, your timeline, and your budget. Book your whitening consult today and leave with a clear plan.
This article is general information, not a substitute for advice from a qualified doctor. Consult a qualified healthcare professional about your own circumstances before acting on anything here.
Sources
Recommended
Comments