Avoid Replacement: 30 Second Daily Steps for Dental Implant Maintenance

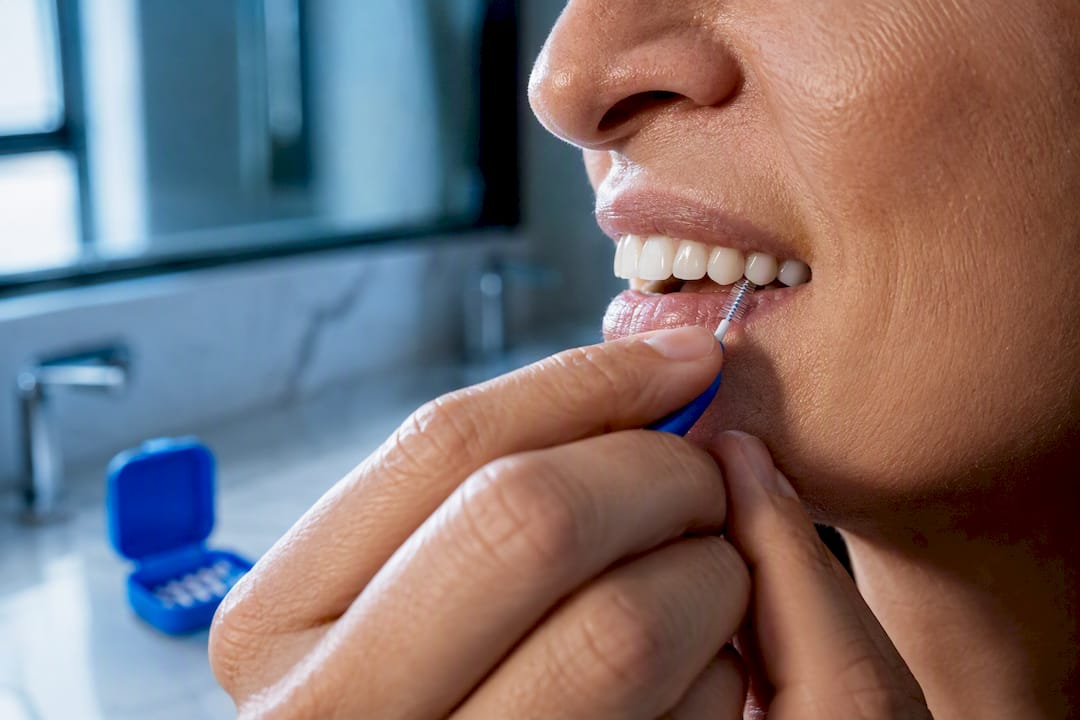
Keeping a dental implant healthy comes down to two habits: brush it twice daily with a soft-bristled brush and low-abrasive toothpaste, and clean between the implant and its neighbors once a day with an interdental brush or water flosser. Pair that with professional supportive peri-implant care, starting at the crown delivery visit and continuing roughly every few months through the first year, then spacing out to intervals tailored to your risk profile.
TL;DR:
Interdental brushes and water flossers are more effective than floss alone for reducing inflammation around implants, especially in wider gaps.
Regular professional visits should start at crown delivery and occur roughly every few months during the first year, with intervals adjusted based on individual risk factors.
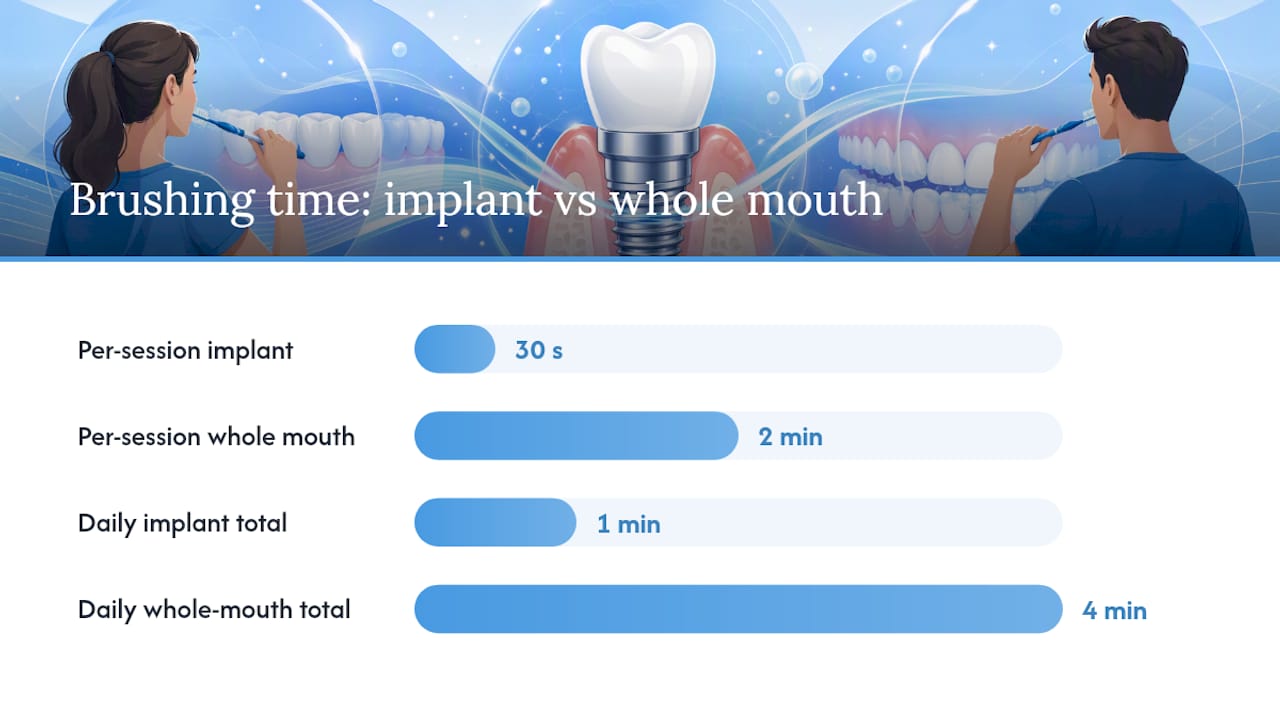
Daily maintenance involves gentle brushing at 45 degrees for at least 30 seconds on each implant site using low-abrasive toothpaste and rinsing with alcohol-free mouthwash; consistency is key.
Patients with a history of gum disease, smoking, uncontrolled diabetes, or heavy grinding need shorter, more frequent recall intervals, sometimes every three months.
During visits, clinicians assess tissue health, take radiographs if needed, and use implant-safe instruments, with early signs of issues requiring prompt treatment rather than waiting for pain.
Table of Contents
What Daily Dental Implant Maintenance Actually Looks Like
An implant does not decay the way a natural tooth can, but the gum and bone around it can still get sick. That is the whole reason dental implant maintenance exists as its own routine, separate from general oral hygiene. Peri-implant tissue has a weaker attachment to the implant surface than gum tissue has to a natural root, which means plaque left sitting at the gumline does more damage, faster, than it would on a healthy tooth.
Here is a general step-by-step version patients can follow for implant care:
Brush twice a day, morning and night, using a soft-bristled brush, manual or powered. Stiff or medium bristles can scratch the crown surface and irritate the gum collar around the abutment.
Angle the brush at roughly 45 degrees toward the gumline where the crown meets the tissue, and use short, gentle strokes rather than aggressive scrubbing. This is the area most likely to accumulate plaque and the area most prone to bleeding if you skip it.
Spend at least 30 seconds on the implant site alone, not just the two minutes total for your whole mouth. Implant crowns often sit slightly differently in the bite than natural teeth, so it is easy to brush past them out of habit.
Choose a low-abrasive, non-whitening toothpaste. Patient guidance from Mayo Clinic specifically flags whitening pastes with abrasive polishing agents as a risk for scratching implant crown surfaces, and micro-scratches attract more plaque over time.
Rinse with an alcohol-free antiseptic mouthwash as an adjunct, not a replacement for brushing and interdental cleaning. Alcohol-based rinses can dry out and irritate the thin band of tissue around an implant, which is already more vulnerable to inflammation than gum around a natural tooth.
If you deal with dry mouth, from medication, age, or a medical condition, rinse with plain water more often during the day and ask your dental team about saliva substitutes. Reduced saliva flow removes one of your mouth’s natural defenses against the bacteria that drive peri-implant disease.
None of this is complicated, but consistency matters more than intensity. A patient who brushes gently and thoroughly for two minutes, twice a day, every day, will do better long term than one who scrubs hard once a day and skips nights when they are tired.
Pro Tip: Keep a spare soft-bristled brush and travel-size interdental brushes in your bag or car. The maintenance routine that fails is usually the one that only exists at your bathroom sink.
Which Interdental Tools Work Best Around an Implant?
Interproximal brushes outperform floss alone for implant health. A 2025 systematic review in Frontiers in Oral Health found that interdental brushes reduce inflammatory markers around implants more effectively than floss used by itself, and that water flossers meaningfully reduce bleeding on probing when added as an adjunct. That finding reshapes how caring for dental implants should be taught to patients: floss is not wrong, but it is no longer the default recommendation it once was for natural teeth.
Why the difference? An interdental brush’s bristles flex into the curved, often wider gap around an implant crown in a way that floss, which relies on tension against a flat contact point, cannot replicate. Floss can also fray or shred against rough abutment margins, leaving fragments behind.
A few practical rules for choosing and using interdental tools:
Size matters more than brand. Bring your brush to your next hygiene visit so your dental team can confirm the head passes through the gap snugly, without forcing it.
Look for nylon-coated or Plaque Seeker-style tips designed with a wider, softer core, since they are gentler on implant surfaces than bare wire brushes.
Use a water flosser on a low-to-medium setting aimed at the gumline, not straight into the pocket, especially in the first weeks after any adjustment to your prosthesis.
If dexterity is limited, a floss threader with implant-safe tape, or a longer-handled proxy brush, can make daily interdental cleaning realistic instead of aspirational.
Insert gently and once, rather than sawing back and forth repeatedly. Repeated aggressive insertion is a more common cause of tissue irritation than the tool itself.
Clinicians increasingly emphasize that the best maintenance plan is the one a patient will actually stick with, which is why the same Frontiers review points to matching the tool to the patient’s dexterity and prosthesis type rather than prescribing one universal method. If floss is the only thing you will reliably use every day, that is still better than an interdental brush sitting unused in a drawer.
How Often Should You See Your Dental Team for Implant Care?
The rationale behind recall scheduling is not arbitrary. Guidance published in the British Dental Journal recommends starting supportive peri-implant care at crown delivery, with visits during the first year every few months, then adjusting the interval based on tissue response and individual risk factors.
Those early, frequent visits are doing real diagnostic work, not just cleaning. Your dental team is establishing baseline measurements: how your gum tissue looks and bleeds around each implant, what your probing depths are, and how your bite is loading the restoration. Clinicians rely on stable, reproducible probing reference points recorded at these early visits, because prosthetic contours can make probing inconsistent later if there is nothing to compare against. Skip the early visits, and a problem at month 18 has no baseline to be measured against.
Several factors typically shorten the recommended interval:
A history of periodontitis before implant placement
Current smoking or recent quitting within the past year
Diabetes, particularly if blood sugar is not well controlled
Inconsistent home care between visits
Bruxism or heavy clenching that stresses the implant and crown
If two or more of these apply to you, a 3-month interval in year one is not overcautious. It is the interval the evidence supports for your risk category. Patients with none of these factors and excellent home care may eventually stretch to annual maintenance, but that decision should be made by your dental team based on your specific findings, not by guessing.
What Happens During an Implant Maintenance Appointment?
A clinical update published through PMC describes a comprehensive implant maintenance visit as typically running about one hour, longer than a routine cleaning, because it covers more diagnostic ground.
Here is the typical sequence:
Medical and dental history update. New medications, a new diabetes diagnosis, or a change in smoking status all change your risk profile and may shift your recall interval.
Visual inspection of the crown, the gum collar, and the tissue color and texture around the implant.
Probing and bleeding-on-probing assessment, using the same reference points established at your baseline visit for an accurate comparison over time.
Radiographs when indicated, usually to check bone levels around the implant if there is any sign of recession, mobility, or bleeding that suggests bone loss.
Occlusion check, confirming the bite is distributing force evenly and the implant is not absorbing more pressure than it is designed to handle.
Professional mechanical plaque removal (PMPR), using instruments safe for implant surfaces.
That last step matters more than it sounds. Standard stainless-steel scaler tips can scratch a titanium or ceramic implant surface, and those micro-scratches become long-term plaque traps. Clinical guidance from the British Dental Journal points to low-abrasive glycine air polishing, plastic-coated ultrasonic tips, and manual instruments designed for implant surfaces as the safer standard. If your dental team ever reaches for a metal scaler around your implant crown without a plastic sleeve, it is fair to ask why.
Most maintenance visits end there. If probing reveals deeper pockets, active bleeding, or radiographic bone loss, your dentist may recommend non-surgical therapy or refer you to a periodontist for a more targeted intervention.
Warning Signs and Risk Factors You Should Never Ignore
Peri-implant disease often starts quietly. Bleeding when you brush, a little tenderness, or a faint bad taste can seem minor enough to shrug off, but clinical reviews consistently show that mucositis, inflammation limited to the soft tissue, can often be reversed with prompt professional cleaning, while the same inflammation left untreated can progress into peri-implantitis, which involves bone loss and is far harder to reverse.
Watch for these signs and call your dental team the same week you notice them, not at your next scheduled cleaning:
Bleeding when you brush or floss around the implant, especially if it happens repeatedly over several days
Persistent tenderness or soreness that does not settle within a day or two
Visible swelling or puffiness in the gum around the crown
A bad taste or odor localized to that side of your mouth
Any sense that the crown feels loose or shifts slightly under pressure
The risk factors that make these signs more likely, and more serious, overlap heavily with the factors that shorten recall intervals: a prior history of periodontitis, smoking, poorly controlled diabetes, inconsistent plaque control, and chronic overload from clenching or grinding. If any of these apply to you, treat bleeding gums around an implant as a same-week appointment, not a wait-and-see situation. Guidance from Mayo Clinic is direct on this point: peri-implant inflammation can progress silently, so early signs deserve immediate attention rather than a “let’s watch it” approach.
Adjusting Your Care Plan for Higher-Risk Cases
Supportive peri-implant care is not one plan applied to every patient. It is a framework: establish a baseline, profile the patient’s risk, select tools that match their actual restoration and dexterity, and set a recall interval accordingly. A patient with a single implant and no periodontal history needs a very different plan from someone wearing a full-arch fixed prosthesis with a history of gum disease.
For fixed bridges and full-arch restorations, standard interdental brushes often cannot reach the space underneath the prosthesis. Guidance on maintaining these restorations points to specially angled proxy brushes and directed water-flosser tips designed to access the underside of the framework, paired with air polishing and plastic-coated ultrasonic tips rather than stainless steel during professional visits.
Other tailoring decisions worth discussing with your dental team:
Bruxers and clenchers often benefit from a nightguard to reduce occlusal overload on the implant and its crown.
Diabetic patients should coordinate implant maintenance timing with their medical management, since poorly controlled blood sugar slows healing and raises infection risk.
Patients with a history of periodontitis typically need shorter recall intervals and more frequent monitoring of bone levels around the implant, not just the soft tissue.
Limited dexterity may call for an electric interdental device or a caregiver-assisted routine rather than tools that assume full manual control.
Pro Tip: If you wear a full-arch prosthesis, ask your dental team to show you the exact angle to hold a proxy brush under your specific framework. The right tool used at the wrong angle misses the tissue that actually needs cleaning.
What a Maintenance Visit Looks Like at Mersaldental
We think of implant maintenance as an hour well spent, not a chore. A typical visit at our downtown Ottawa office covers your medical history update, a full clinical exam, probing at established reference points, radiographs when there is a reason to look closer, and a thorough professional cleaning using instruments designed not to scratch your implant surface.
If you have never received a written plan for your implant, ask for one. A clear SPIC schedule, with your baseline measurements documented, gives you and your dental team a shared reference point for every visit that follows. We also encourage patients to request their baseline records early, ideally at the crown delivery appointment, so nothing is measured against guesswork later.
Because dental problems rarely wait for convenient timing, Mersaldental offers same-day treatment and emergency appointment access alongside direct insurance billing, so a concern that comes up between scheduled visits does not have to wait weeks to get looked at.
Keeping the Crown, Bridge, or Denture on Top Clean
The implant itself is only half the equation. Whatever sits on top, a single crown, a bridge, or an implant-supported denture, needs its own maintenance attention, and each type has different blind spots.
A single crown is the most straightforward: brush it like a natural tooth, with extra care at the gumline, and clean underneath the contact point with an interdental brush daily. A bridge spanning multiple implants creates a gap underneath the connecting section that a toothbrush cannot reach; a floss threader or a super floss with a stiffened end, guided under the bridge, is often the only way to clear that space, and a water flosser on a directed setting works well as a backup.
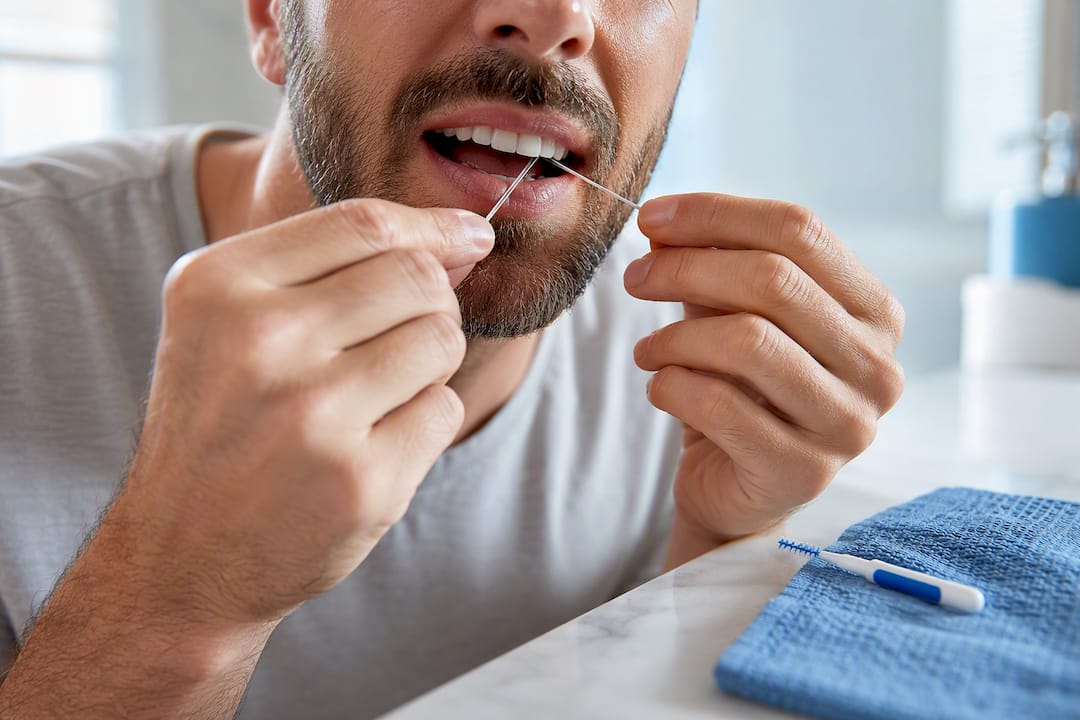
Implant-supported dentures, whether snap-on overdentures or fixed full-arch restorations, need to come out (if removable) for a nightly soak and cleaning with a denture-specific brush, never a standard toothpaste, which can be too abrasive for the denture material. The attachment points where the denture clips onto the implants collect plaque quickly and deserve a focused pass with a small interdental brush before the denture goes back in. For fixed full-arch prostheses that do not come out, the space between the gum and the underside of the framework is the highest-risk zone, and it usually needs the angled proxy brush technique described earlier.
Whatever the restoration type, check it at every hygiene visit for wear, chips, or loosening. A crown or bridge that feels slightly different when you bite down is worth mentioning immediately, since a shift in fit changes how force distributes across the implant underneath.
Titanium vs. Ceramic Implants: Does the Material Change Your Routine?
Your daily routine stays the same regardless of material, but a few nuances are worth knowing. Titanium implants, still the most common choice, have decades of clinical data behind their surface behavior and are highly resistant to corrosion, but their surface can still be scratched by stainless-steel instruments, which is why implant-safe tools matter during both home care and professional cleanings.
Ceramic (zirconia) implants have gained popularity for patients who prefer a metal-free option or have a documented titanium sensitivity. Zirconia’s surface is harder and smoother at a microscopic level, which some research suggests may make it slightly more resistant to plaque adhesion than titanium, though the clinical difference in real-world maintenance is modest. What matters more than the base material is the crown or restoration attached to it, whether zirconia, porcelain, or a metal alloy, since that visible surface is what you are actually brushing every day.
One practical point for both materials: avoid abrasive whitening toothpaste. It will not whiten a crown the way it lightens natural enamel, and the abrasive particles can dull glazed ceramic surfaces or scratch metal components over time, making the surface rougher and more plaque-retentive. If your restoration ever feels less smooth than it did at delivery, mention it at your next visit rather than assuming it is normal wear.
Diet and Daily Habits That Affect How Long Your Implant Lasts
What you eat and how you use your teeth day to day plays a bigger role in implant longevity than most patients expect. Hard foods, ice, and habits like chewing on pen caps or opening packages with your teeth put concentrated force on a crown and abutment interface that was not designed for repeated shock loading. Over months and years, that stress can loosen the crown’s connection or contribute to bone changes around the implant.
Sticky, sugary foods matter for a different reason: they cling around the crown margin and gumline, feeding the same bacteria responsible for peri-implant inflammation. This is not about giving up sugar entirely, but rinsing or brushing sooner after eating something sticky reduces how long that bacterial fuel sits against your tissue.
Smoking deserves its own mention because the evidence against it is specific and consistent. Nicotine restricts blood flow to gum tissue, which slows healing and weakens the tissue’s ability to fight off early inflammation. That is one reason smoking status shows up repeatedly as a factor that shortens recommended recall intervals. If you are a smoker with an implant, understanding the specific risks it introduces is worth a direct conversation with your dental team, since the maintenance plan built for a nonsmoker may not be aggressive enough for you.
Alcohol in moderation has not been shown to directly damage implants, but heavy or frequent use can dry out oral tissue and interfere with healing after any dental work, including maintenance procedures involving local anesthetic.
Do Antimicrobial Rinses Actually Help Protect an Implant?
Antimicrobial mouthwash plays a supporting role in implant maintenance, not a starring one. An alcohol-free antiseptic rinse used once or twice daily can reduce the overall bacterial load in your mouth, which is genuinely useful around implant tissue that is more reactive to bacterial buildup than the gum around natural teeth. But no rinse replaces mechanical cleaning: bacteria organize into a biofilm on the crown surface and around the gumline that only brushing and interdental tools can physically disrupt.
Chlorhexidine rinses, often prescribed short-term after implant placement or periodontal therapy, are more potent but come with tradeoffs, including temporary staining and taste changes, so they are typically used for a defined period rather than indefinitely. Long-term daily use should be a decision made with your dental team, not a default habit.
For most patients past the initial healing period, a gentler alcohol-free antiseptic rinse used as a daily adjunct, alongside twice-daily brushing and interdental cleaning, strikes the right balance between reducing bacterial load and protecting the delicate tissue around the implant. If you are prone to dry mouth, check the label: some antiseptic formulas can worsen dryness, which works against the goal by removing more of your mouth’s natural bacterial defenses.
Why Maintenance Beats Replacement
We would rather see you every few months for a cleaning than see you once for a failed implant. That is not a sales pitch, it is what the evidence on mucositis reversal actually shows: catch the inflammation early, and it resolves. Miss it, and you are looking at bone loss that may not be fully reversible.
Implant maintenance works best as a partnership. We can set the recall schedule and use the right instruments, but the daily brushing and interdental cleaning happens at your sink, not in our chair. If something feels off between visits, bleeding, tenderness, a loose sensation, call us. Waiting for pain means waiting too long.
— Mersal
Book Your Implant Maintenance Visit With Mersaldental
Mersaldental gives you a clear alternative to guessing about your implant’s health between checkups. As a full-service family dental office in downtown Ottawa, we combine same-day treatment availability with direct insurance billing, including CDCP and IFHP, so a maintenance concern does not turn into a scheduling headache or a surprise bill.

If you already have an implant, book a hygiene appointment so we can establish or update your baseline measurements and confirm your recall interval matches your actual risk factors. If you notice bleeding, tenderness, or anything that feels different about your crown, our emergency care options mean you can get seen quickly rather than waiting weeks. And if you are still weighing whether implants are the right restorative option for a missing tooth, our team can walk you through what ongoing maintenance looks like before you commit. Call our downtown Ottawa office or book online to set up a maintenance review.
Sources
For deeper reading: the PMC clinical update on implant maintenance covers visit structure and instrumentation; the British Dental Journal’s SPIC guidance details recall intervals; the Frontiers 2025 review backs interdental brush evidence; Mayo Clinic offers patient-facing care basics; and the Government of Canada dental care portal covers public program eligibility.
This article is general information, not a substitute for advice from a qualified doctor. Consult a qualified healthcare professional about your own circumstances before acting on anything here.
FAQ
What Do You Wish Patients Knew Before Getting Dental Implants?
The biggest gap is expectations around maintenance: an implant is not “done” once it is placed. It requires the same twice-daily brushing and daily interdental cleaning as natural teeth, plus regular professional recalls, for as long as you have it.
What Is the Number One Reason Dental Implants Fail?
Peri-implantitis, inflammation and bone loss around the implant driven by plaque buildup, is the leading cause of late implant failure, and it is closely tied to risk factors like smoking, uncontrolled diabetes, and inconsistent home care.
Is It Hard to Keep Dental Implants Clean?
It is not hard, but it does require a slightly different toolkit than natural teeth. An interdental brush sized to fit your specific implant gap, used daily alongside twice-daily brushing, handles most of the work, and a water flosser makes a helpful adjunct.
What Is the Average Lifespan of a Dental Implant?
Implants are frequently described as lasting decades, often a lifetime, when paired with consistent home care and professional supportive peri-implant care on the recommended recall schedule. Lifespan varies by individual risk factors, which is why personalized maintenance intervals matter more than a single universal number.
How Often Should I See My Dentist for Implant Maintenance?
A common starting point is every 3 to 4 months during the first year after crown delivery, then an individualized interval between 3 and 12 months based on your risk factors and how your tissue responds at each visit.
Recommended
Comments