Invisalign Attachments: What Patients Need to Know


Invisalign attachments, officially called Invisalign SmartForce™ attachments, are small tooth-colored composite bumps bonded directly to your teeth. They give your aligners something to grip so they can produce movements that clear plastic alone cannot reliably achieve. They are temporary, painless to place, and removed without drilling at the end of treatment.
Three things to know right away:
Visibility: Attachments are tooth-colored and generally discreet at conversational distance, though they can be more noticeable up close or on video calls.
Duration: Most patients wear attachments throughout the active phase of treatment, typically for several months depending on their plan.
Basic care: Keep wearing your aligners as prescribed, brush after every meal, and call your provider promptly if an attachment comes off.
Pro Tip: When seating a new aligner, press it down firmly with your fingertips from front to back rather than biting down. Biting on the tray edges puts uneven pressure on attachments and is one of the most common causes of early pop-offs.
Table of Contents
What are Invisalign SmartForce™ attachments and how do they work?
SmartForce attachments are small dots or ridges of tooth-colored dental composite resin bonded to the enamel surface of specific teeth. They come in several shapes, each designed for a different mechanical job:
Rectangular attachments create a flat surface the aligner can push against to tip or torque a tooth.
Ellipsoid (oval) attachments are used for rotational movements, giving the tray a curved edge to grip and twist a tooth around its long axis.
Beveled attachments have an angled face that converts the aligner’s squeezing force into a vertical push, pulling a tooth up (intrusion) or down (extrusion) in the gumline.
Without these grip points, aligners struggle to produce reliable rotations or vertical movements. The aligner acts like a sleeve around the tooth, and on a smooth round surface that sleeve tends to slide rather than rotate or lift. Attachments act as handles the tray can push or pull against, converting the aligner’s uniform squeeze into a controlled, directional force.
Placement is not random. Clinicians design attachment positions using 3D treatment planning software so each bump is intentionally located for predictable movement across the full treatment sequence. Attachments may appear only on certain trays as treatment progresses, not necessarily from the very first aligner.
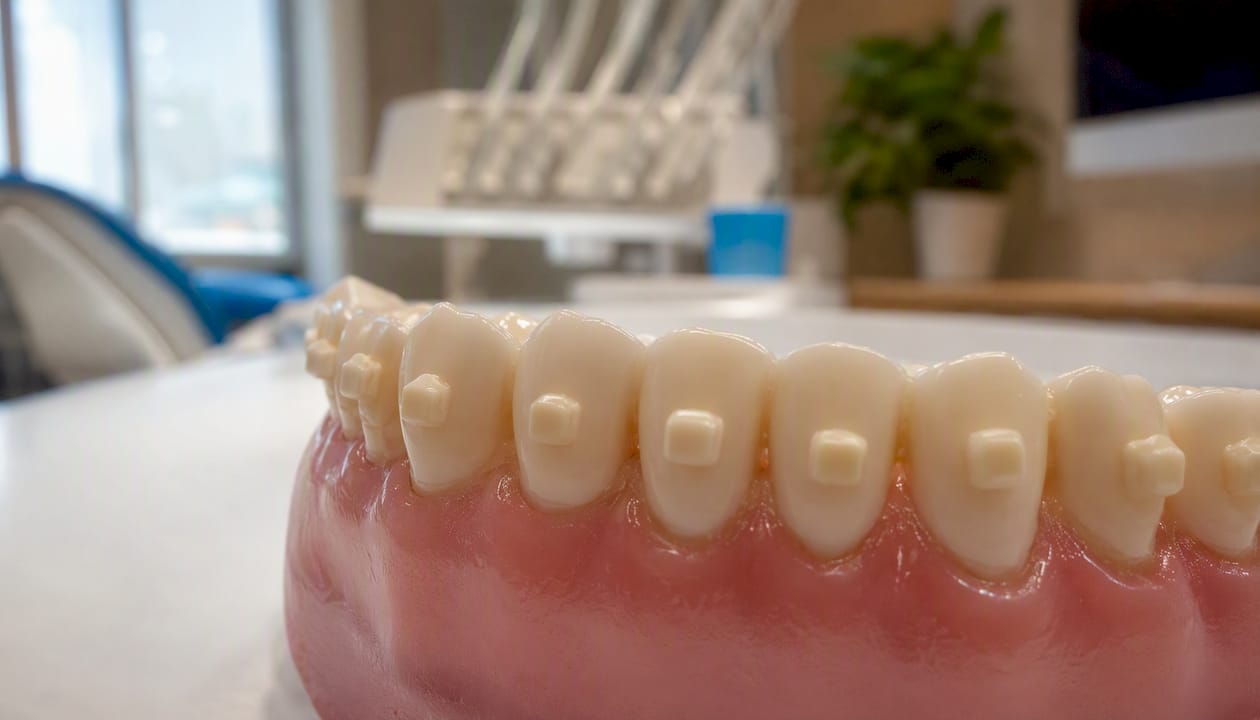
Not every raised area on your tray is a bonded attachment. Some bumps are precision bite ramps built directly into the aligner plastic to assist with bite correction. These are aligner features, not tooth-level attachments, and they disappear when you remove the tray.
Will you need attachments? Common clinical reasons
Attachments are not required for every case. Whether you need them depends entirely on the tooth movements your ClinCheck treatment plan calls for, not on a blanket rule applied to all Invisalign patients.
Cases that commonly require attachments include:
Significant rotations: Canines and premolars with round roots are especially difficult to rotate without a grip point.
Moderate to severe crowding where teeth need to move through tight spaces.
Extrusion or intrusion: Moving a tooth vertically in the jaw socket almost always requires an attachment.
Complex root positioning or torque corrections.
Bite corrections that involve moving individual teeth to change how upper and lower arches meet.
A patient with mild spacing and no bite issues may complete treatment with no attachments at all. A patient needing a single-tooth rotation, by contrast, will almost certainly have at least one attachment on that tooth. The difference comes down to what the ClinCheck simulation identifies as the required movement path.
Movement Type | Attachment Typically Needed? | Why |
Mild spacing | No | Aligners can close small gaps without extra grip |
Significant rotation | Yes | Round tooth roots need a lever point |
Extrusion / intrusion | Yes | Vertical forces require a handle to push against |
Moderate crowding | Often | Teeth need directional control through tight spaces |
Mild crowding | Sometimes | Depends on the degree and tooth shape |
Before your consult, note whether you have any teeth that feel rotated, crowded, or noticeably higher or lower than their neighbors. These are the signs most likely to predict attachment use.
How a provider places attachments: the step-by-step procedure
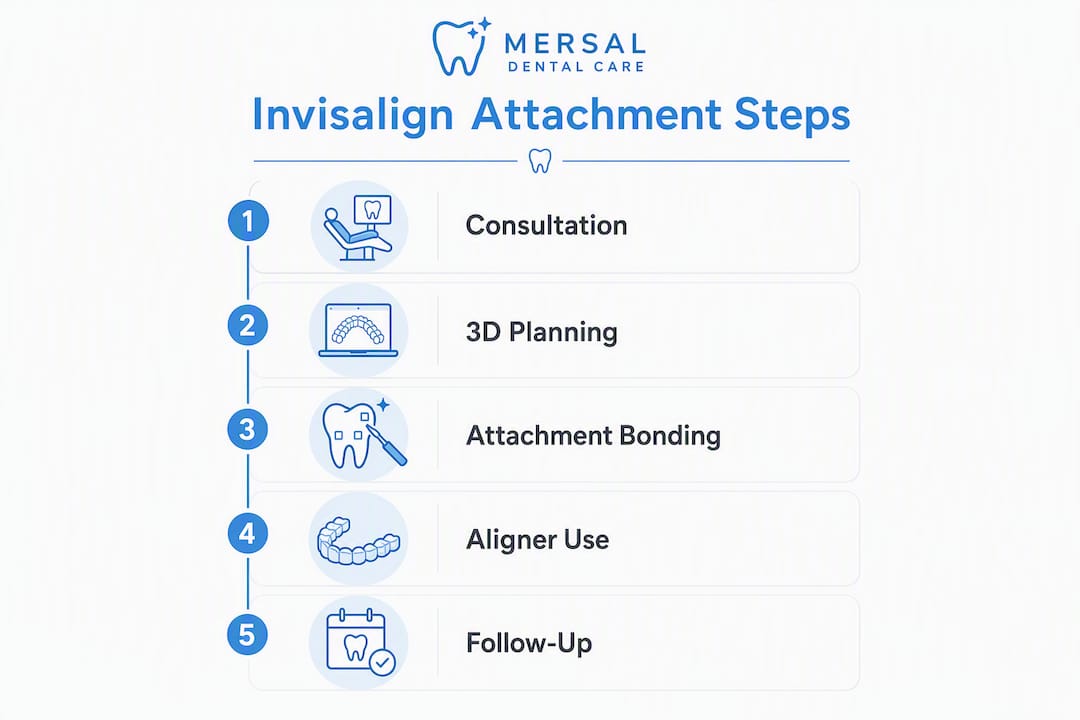
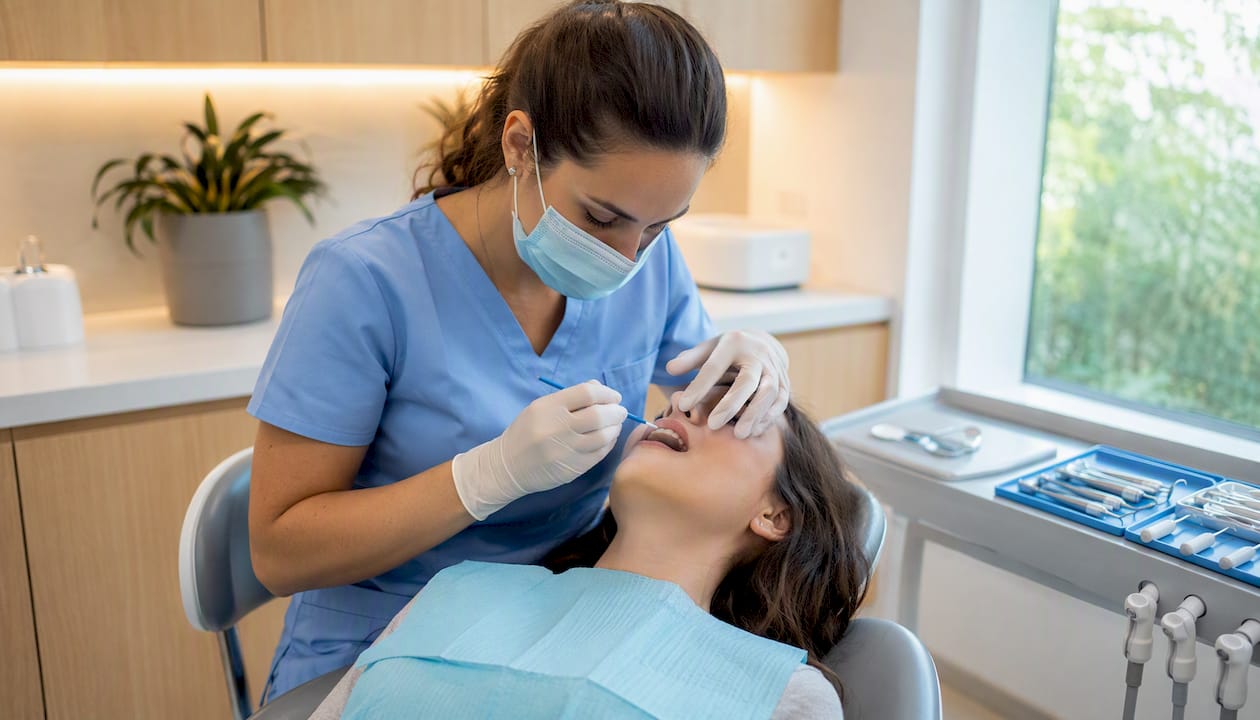
The bonding appointment is straightforward and comfortable. A typical visit takes roughly 30–45 minutes, and no anesthetic is needed.
Cleaning and drying: Your provider cleans and dries the target teeth thoroughly. Any moisture on the enamel surface can weaken the bond.
Etching: A mild acid gel is applied briefly to the enamel to create a slightly rough surface for better adhesion, then rinsed off.
Template seating: A clear template, custom-made from your ClinCheck plan, is placed over your teeth. It has small cutouts exactly where each attachment will sit.
Composite placement: Tooth-colored composite resin is pressed into the template cutouts onto the prepared enamel.
Curing: A blue curing light hardens the composite in seconds.
Polish and check: The template is removed, excess material is polished away, and your provider checks each attachment for proper shape and seating.
First aligner placement: Your provider seats your first aligner with attachments so you can feel how it fits before you leave.
What to expect immediately after: The attachments will feel noticeable with your tongue for the first day or two. That awareness fades quickly as your mouth adjusts. Your first aligner may feel tighter than previous ones because it now has to snap over the attachment bumps. That snugness is normal and confirms the attachments are doing their job.
Timeframe | What to Do |
First day | Avoid sticky or hard foods; let the bond fully set |
First few days | Brush gently around each attachment; avoid whitening products |
First aligner change | Check that each attachment is still fully intact before switching trays |
Will attachments hurt, and will people notice them?
The placement procedure itself is painless. No drilling, no injections. Some patients feel mild pressure or a slight sensitivity in the first day or two after bonding, but this settles on its own. Long-term discomfort from attachments alone is uncommon.
On visibility, attachments are designed to be discreet and tooth-colored, often unnoticeable at normal conversational distance. Your provider matches the composite shade to your natural tooth color as closely as possible and tends to place attachments on the sides or back teeth when the treatment plan allows. Up close, or in certain lighting, they can be visible as small bumps. On video calls, especially with bright ring lighting, they may catch the light more than you expect.
A few practical notes on comfort and social situations:
Attachments can make aligners feel snugger and slightly harder to remove at first. Use a removal tool or hook your finger under the back edge of the tray rather than prying from the front.
Your tongue will find the bumps. This is normal and not a sign of a problem.
Avoid touching attachments repeatedly with your tongue, as this habit can loosen the bond over time.
At social events or in photos, your aligners are far more visible than the attachments underneath them.
Pro Tip: On video calls, a matte lip color draws the eye away from your teeth. If you’re concerned about attachment visibility in a specific setting, ask your provider whether any of your planned attachments can be repositioned to less visible surfaces without affecting your treatment outcome.
How to care for attachments and aligners every day
Good daily habits protect your attachments, keep your teeth healthy, and reduce the chance of a pop-off mid-treatment.
Daily care routine:
Brush your teeth after every meal before reinserting your aligners. Food trapped under an aligner against an attachment creates a cavity risk.
Use a soft-bristled toothbrush and non-abrasive toothpaste around attachments. Abrasive pastes can dull the composite surface over time.
Floss daily. A floss threader or water flosser (such as a Waterpik) makes it easier to clean around attachment bases.
Rinse your aligners in cool water only. Hot water warps the plastic and can loosen the fit around attachments.
Remove aligners before eating or drinking anything other than plain water.
Foods and habits that commonly dislodge attachments:
Sticky candies, caramel, and chewing gum — these pull directly on the composite.
Hard foods like raw carrots, nuts, and ice — biting down with force can crack the bond.
Biting with your front teeth into hard foods (apples, crusty bread) rather than cutting them first.
Chewing on pens, straws, or fingernails.
Drinking very hot beverages while wearing aligners.
When to call your provider vs. when to wait:
Call promptly if an attachment falls off, if you notice a sharp edge where an attachment was, or if your aligner no longer seats fully. You can wait until your next scheduled visit for minor surface roughness or very slight discoloration of an attachment that is still fully bonded.
Do attachments fall off? What to do if one comes off
Pop-offs happen occasionally and are a normal part of treatment. Common causes include eating sticky or hard foods, biting down unevenly, or a bonding surface that was slightly contaminated during placement. It is not a sign that something has gone seriously wrong.
What to do, step by step:
Check your aligner fit. Put the aligner in and see whether it still seats fully against your teeth. If it does, continue wearing it normally.
Do not attempt DIY re-bonding. Household adhesives are not safe for use in the mouth and can damage enamel or make professional re-bonding harder.
Stop using elastics at that site. If you have rubber bands attached to a hook near the lost attachment, stop using them at that spot until it is professionally re-bonded.
Call your provider. Report the pop-off and ask whether you need to come in before your next scheduled visit or whether it can wait.
Keep wearing your aligners. If the aligner still seats correctly, continuing to wear it maintains treatment momentum. Stopping aligner wear causes bigger setbacks than a missing attachment.
Prevention tips:
Cut hard foods into small pieces before eating.
Remove aligners before every meal, every time.
Avoid biting into food with your front teeth when those teeth have attachments.
At the re-bond appointment, your provider will clean the tooth surface, re-etch the enamel, and bond a fresh composite attachment using the same template process as the original placement. The visit is quick, usually under 15 minutes.
How long do attachments stay on, and what does removal look like?
Most patients wear attachments throughout the active phase of their aligner treatment. For many cases, that means somewhere in the range of 6–18 months, though the exact duration depends on your individual ClinCheck plan. Some attachments may be removed partway through treatment once a specific movement is complete, while others stay on until the final aligner.
Removal steps:
Your provider uses a specialized hand instrument to gently fracture the composite bond. No drilling is involved.
Any residual composite is polished off the enamel surface.
The tooth surface is checked and smoothed.
Removal is painless and does not permanently alter the enamel when performed correctly. The whole process typically takes 15–30 minutes depending on how many attachments you have.
One thing to be aware of: if attachments have been in place for a long time, the enamel directly under them may look slightly different in shade compared to the surrounding tooth surface. This is usually minor and often resolves on its own. Your provider can recommend a whitening treatment after removal if you want to even out the shade. Avoid whitening while attachments are still bonded, as the composite will not bleach and the contrast will become more noticeable.
Attachments may not all come off at the same appointment if your provider removes them in stages.
After removal, your retainer phase begins. Retainers hold the teeth in their new positions.
Ask your provider at the removal appointment whether any refinement aligners are planned, as these may require new attachments.
Attachments vs. hooks and elastics: what is the difference?
These three terms describe related but distinct components of Invisalign treatment, and patients often confuse them.
Attachments are the bonded composite bumps on your teeth. They stay on throughout the relevant treatment stages and give the aligner tray a mechanical grip point for moving individual teeth.
Hooks and buttons are small metal or composite loops bonded to teeth or built into aligner edges. Their purpose is to anchor rubber bands (elastics) that apply directional force for jaw and bite correction. Some providers use the terms “hooks” and “buttons” interchangeably; technically, hooks are often built into the aligner plastic itself, while buttons are bonded to the tooth.
Elastics (rubber bands) connect from a hook on the upper arch to a button or hook on the lower arch. They pull the jaws into a corrected relationship over time, addressing overbites, underbites, and crossbites that attachments alone cannot fix.
Component | Bonded to Tooth? | Primary Function |
SmartForce attachment | Yes | Grip point for individual tooth movement |
Button / hook | Yes (or built into aligner) | Anchor for elastic rubber bands |
Elastic (rubber band) | No | Jaw and bite correction via directional pull |
A practical note on daily handling: when removing your aligners, take out your elastics first. Pulling the aligner off while elastics are still attached puts stress on both the hooks and the aligner edges. Attachments stay bonded and do not come out with the aligner.
Do attachments cost extra, and what does insurance typically cover?
In most cases, attachments are included in the overall Invisalign treatment fee rather than billed as a separate line item. However, billing practices vary between providers, and it is worth confirming this before treatment begins.
Re-bonding a popped-off attachment may or may not be covered depending on your provider’s policy and your insurance plan. Some offices include a certain number of re-bonds in the treatment fee; others bill separately.
Questions to ask your insurance provider:
Is Invisalign treatment covered under my orthodontic benefit, and does that include all associated procedures like attachment placement?
If an attachment needs to be re-bonded, is that billed separately or included in the treatment fee?
Does my plan cover refinement aligners, and would new attachments placed during refinements be covered?
Is there a lifetime orthodontic maximum that applies, and how much of it has been used?
Practical billing tips:
Ask your dental provider for an itemized treatment estimate before signing a contract. This shows whether attachments, re-bonds, and retainers are bundled or separate.
Keep all receipts and explanation-of-benefits documents. If a re-bond is billed unexpectedly, you will need documentation to dispute or appeal.
Ask whether the office offers direct insurance billing so you are not paying out of pocket and waiting for reimbursement.
Confirm the office’s policy on emergency re-bond visits outside of scheduled appointments.
Pro Tip: Ask your provider specifically: “Is re-bonding a fallen attachment included in my treatment fee, or will I be charged separately?” Getting this in writing before treatment starts prevents billing surprises later.
Questions to ask your provider at the consult
Walking into a consult with specific questions gets you clearer answers and helps you compare providers fairly. Here is a ready-to-use list:
Does my ClinCheck plan include attachments, and if so, how many and on which teeth?
Can I see the ClinCheck simulation so I understand where attachments will be placed and why?
How will you match the composite shade to my tooth color?
What is your policy if an attachment falls off? Is re-bonding included in my treatment fee?
How long do you expect my attachments to stay on based on my plan?
Will I need hooks or elastics in addition to attachments, and if so, how long will I wear them?
Are there any teeth where attachments can be avoided or repositioned to less visible surfaces?
What does the removal appointment look like, and will there be any enamel polishing needed?
Is there any extra charge for attachments, re-bonds, or refinement aligners in your fee structure?
Can I see photos of patients at a similar treatment stage so I know what to expect visually?
If your provider cannot show you the ClinCheck simulation or cannot answer the billing questions clearly, those are reasonable grounds to request a second opinion. A well-planned case should have clear answers to all of the above before you commit.
A note on alternatives: If you are concerned about attachment visibility or the complexity of your case, ask your provider whether clear aligner alternatives or traditional braces might achieve a comparable result. Some mild cases can be treated with fewer or no attachments.
Key Takeaways
Invisalign SmartForce™ attachments are temporary, tooth-colored composite bumps that expand what aligners can do, and most patients find them manageable with the right daily habits.
Point | Details |
Attachments expand aligner capability | SmartForce attachments enable rotations, intrusions, and extrusions that aligners alone cannot reliably produce. |
Not every case needs them | ClinCheck planning determines whether attachments are needed based on your specific tooth movements. |
Pop-offs are manageable | If an attachment falls off, check aligner fit, stop elastics at that site, and call your provider rather than stopping wear. |
Removal is painless | Attachments are removed with a hand instrument and polished smooth, with no drilling into enamel. |
Mersaldental offers free Invisalign consults | Book a free consult to review your ClinCheck plan, attachment needs, and billing options with our team. |
Attachments work best when you understand them
Most of the anxiety patients bring to us about Invisalign attachments comes from not knowing what to expect before the bonding appointment. Once they see the process, the size of the bumps, and how discreet they actually are, the concern fades quickly.
What we find clinically is that attachments are not a complication of Invisalign treatment. They are what makes Invisalign treatment work for a broader range of cases. Without them, clear aligners would be limited to the simplest spacing and crowding corrections. With them, we can address rotations, vertical movements, and bite issues that previously required traditional braces.
The patients who have the smoothest experience with attachments are the ones who follow two habits consistently: they remove their aligners before eating, every single time, and they call us promptly when something feels off rather than waiting to see if it resolves. A popped attachment re-bonded quickly has almost no effect on treatment progress. The same attachment left off for three weeks while a patient hopes it will somehow fix itself is a different story.
If you are weighing whether Invisalign with attachments is right for you, the best thing you can do is see the ClinCheck simulation before committing. It shows exactly where attachments will be placed, what movements they are doing, and what your teeth will look like at each stage. That level of transparency is what we offer at every free Invisalign consult at our clinic.
Ready to see your Invisalign plan with attachments?
Invisalign with SmartForce attachments is one of the most effective ways to straighten teeth without metal brackets, and at Mersaldental in downtown Ottawa, we make the process clear from the very first visit. We walk every patient through their ClinCheck simulation so you see exactly where attachments will be placed and why, before any composite touches your teeth.
We accept new patients, offer direct insurance billing, and work with government programs including the CDCP. If you have questions about attachment visibility, re-bond policies, or what your insurance covers, our team answers all of it at the consult, at no charge. Book your free Invisalign consultation at Mersaldental and leave with a clear picture of your treatment plan, your attachment needs, and your costs, before you commit to anything.
Useful sources
The following sources informed this article. We encourage you to bring any of these references, or your own questions, to your consult.
Invisalign: Living with Invisalign — SmartForce Attachments
WAX Ortho: Invisalign Attachments Explained
DSM Cosmetic Dentist: Invisalign Attachments and Rubber Bands Explained
Ortho Studio Geneva: Why Do Some Aligners Have Bumps or Ridges?
Dentalis Clinic: Invisalign Attachments Guide
RealSelf Q&A: Bumps on the Back of Aligners — Buttons vs. Attachments
PUL Dental: What Are Invisalign Hooks?
This article provides general patient information and is not a substitute for professional dental advice. Confirm your specific treatment plan, attachment needs, and coverage details with a licensed dental provider.
Recommended
Comments